Thanks to master plugin creator, Scott Harrison for this guest post on using Google and Apple Sign-In in your apps.
Many apps and games have there own login system. Whether you need a login for storing data, sharing, or multiplayer, setting up a login system is an important part of your app. While an email and password system is usually what most apps use, you should consider looking at using a third-party login system. Third-party systems allow the user to log in in faster and save the user from having to make another password. This tutorial will show you how to integrate both Google and Apple sign in.
Google Sign In
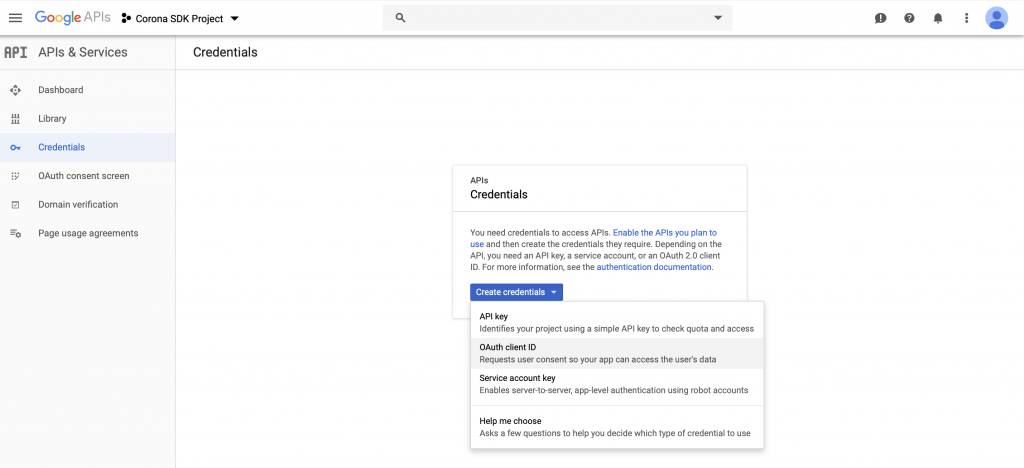
Start of by going to Corona Labs Marketplace and activate the Google Sign In Plugin. Next you need to get a client ID for Android and iOS. Go to Google console and enable “Identity Toolkit API”. Next create client id in Credentials section. Setup a client ID for iOS and Web (which is used for Android).

Also make sure to add to put your iOS URL scheme inside you build.settings

settings =
{

    android =
    {
        useGoogleServicesJson = true,

        usesPermissions =
        {
            "android.permission.INTERNET"
        },

    },
    iphone =
    {
        plist =
        {
            CFBundleURLTypes =
            {
                {
                    CFBundleURLSchemes =
                    {
                        "com.googleusercontent.apps.REPLACE_WITH_YOUR_URL_SCHEME",
                    }
                }
            },
        },
    },


    plugins = {
        ["plugin.firestore"] =
            {
                publisherId = "tech.scotth",
            },
    },
}
Note: if you are using Firebase, just grab the iOS client ID from the GoogleService-Info.plist file under CLIENT_ID key and for Android go to google-services.json under the keys client >oauth_client>client_id,
Next use the code snippet below to insert the client id based on the platform you are using.
local googleSignIn = require( "plugin.googleSignIn" )
local json = require( "json" )

googleSignIn.init()
local androidClientID = "Your Android client id"
local clientID = "Your iOS client id" -- iOS default

if ( system.getInfo( "platform" ) == "android" ) then
   clientID = androidClientID
end

googleSignIn.signIn( clientID, nil, nil, function ( event )
        print( json.encode( event ) )
    end
)
Read more about the Google Sign In Plugin in the documentation.
Apple Sign In
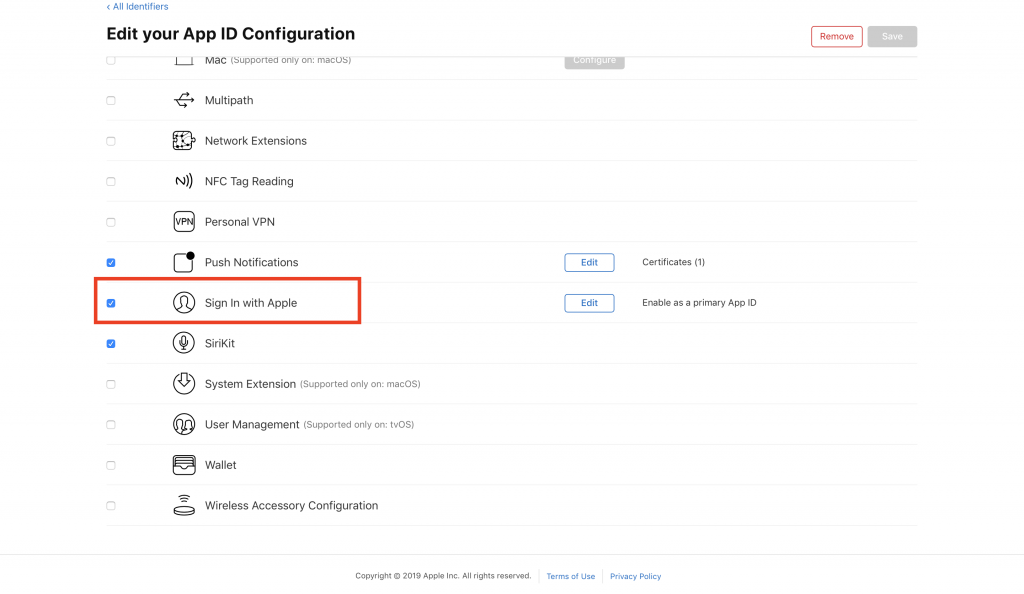
Apple introduced a new way to sign in on iOS 13+. They are requiring app makers to add Apple Sign In if they use other third-party sign in options like Google or Facebook. It is easy for developers to implement Apple Sign In for iOS devices. To set up all you need to do is start by activating the free Apple Sign In Plugin in the Corona Marketplace. Make sure your App ID is setup with the Apple Sign In entitlement. This will require you to generate and download a new provisioning profile after adding the entitlement.

Add Apple Sign In entitlements to build.settings
iphone =
    {
        plist =
        {
            -- put entitlements outside plist
        },
        entitlements = {
            ["com.apple.developer.applesignin"] = {"Default"},
        }
    },
    plugins = {
        ["plugin.appleSignIn"] =
            {
                publisherId = "tech.scotth",
            },
    },
Then just use the Apple Sign In plugin in your app to login on your iOS 13+ device
local appleSignIn = require( "plugin.appleSignIn" )
local json = require( "json" )

appleSignIn.show( "name", function( event )
        print( json.encode( event ) )
    end
)
Note: The first value in appleSignIn.show() can either be “name“, which will get the name of the user, “email“, will get the email of the user, or “nameAndEmail“, which will get the email and name.
Read more about the Apple Sign In Plugin in the documentation.
* This article was originally published here
No comments:
Post a Comment